Configuring Input Node in Workflow Automation
The Input Node is a powerful tool for gathering user inputs through customizable forms during workflow execution. These inputs can then be used by subsequent nodes, such as Approval Nodes or Automation Nodes, to perform actions. Additionally, the Input Node integrates with the Service Portal, enabling end users to interact with workflows directly.
Use Case
Service Portal
The Service Portal provides a user-friendly interface that allows users to interact with bots, request automation services, and monitor the progress of their requests. It streamlines the process of collecting inputs, approvals, and automated task execution in a self-sufficient manner. Users can access a variety of apps published to the portal and engage with them to automate workflows without needing technical expertise.
Service Portal Use Cases
The Service Portal enables users to:
- Implement Just-In-Time (JIT) Access: Request temporary access to systems or resources with automated approvals.
- Automate Operational Tasks: Perform software installations, system configurations, and resource provisioning seamlessly.
- Onboard and Offboard Employees: Manage user accounts, access permissions, and hardware assignments efficiently.
- Request IT Services: Request IT support, software installations, or new equipment.
- Manage Infrastructure: Provision and deprovision cloud resources, network configurations, or storage.
- Approve or Reject Requests: Allow designated approvers to manage service requests directly within the portal.
Service Portal Advantages
- Enhanced User Experience: Simplifies bot interactions and automation requests.
- Faster Task Execution: Reduces manual intervention through automation.
- Streamlined Approvals: Ensures oversight with built-in approval workflows.
- Status Tracking: Provides transparency into request progress.
- Self-Sufficiency: Empowers users to request services independently.
- Centralized Access to Automation: Offers a unified interface for all automation workflows.
Service Portal Demo
Scenario:
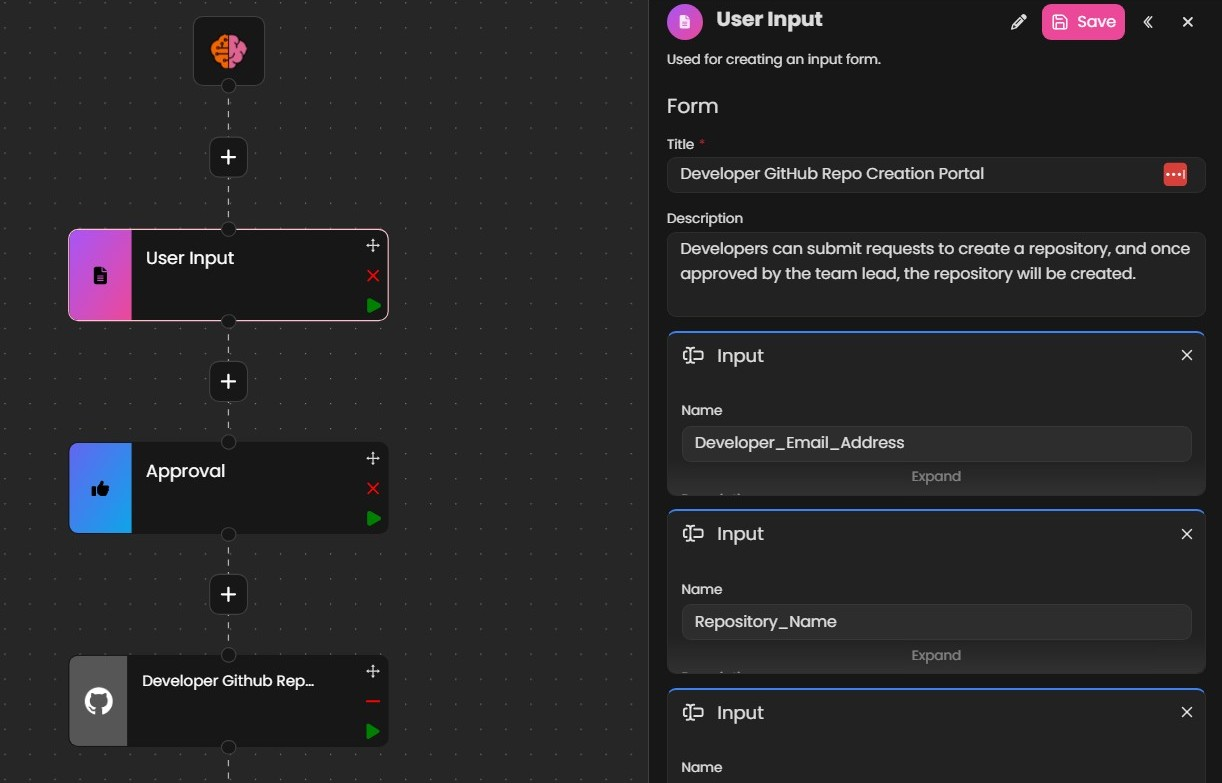
A developer requests the creation of a new repository. The Input Node collects the following details via a form:
- Developer Email Address
- Repository Name
- Description for the Repository
- Approver Email Address
Once the required details are submitted, the workflow processes them as follows:
- The Approval Node sends a request to the approver for validation.
- Upon approval, the Automation Node executes actions to create the repository and grant the developer appropriate access.
To learn more about how to use the Service Portal, visit Service Portal Guide.
Steps to Configure an Input Node
1. Add the Input Node
- Drag and drop the Input Node from the node library onto your workflow canvas.
2. Open Node Configuration
- Click on the Input Node to open its configuration panel.
3. Configure Input Node Properties
-
Use the configuration panel to customize the node's behavior. Key settings include:
- Expiry (in minutes): Define how long the form remains valid after it's triggered. Default: 168 minutes.
- Authorization: Specify who is authorized to resolve the form (e.g., Bot Caller, User Groups, or Specific Roles). Default: Bot Caller.
- Notification: Set up notification channels (e.g., Slack, Email) to alert stakeholders about the form submission.
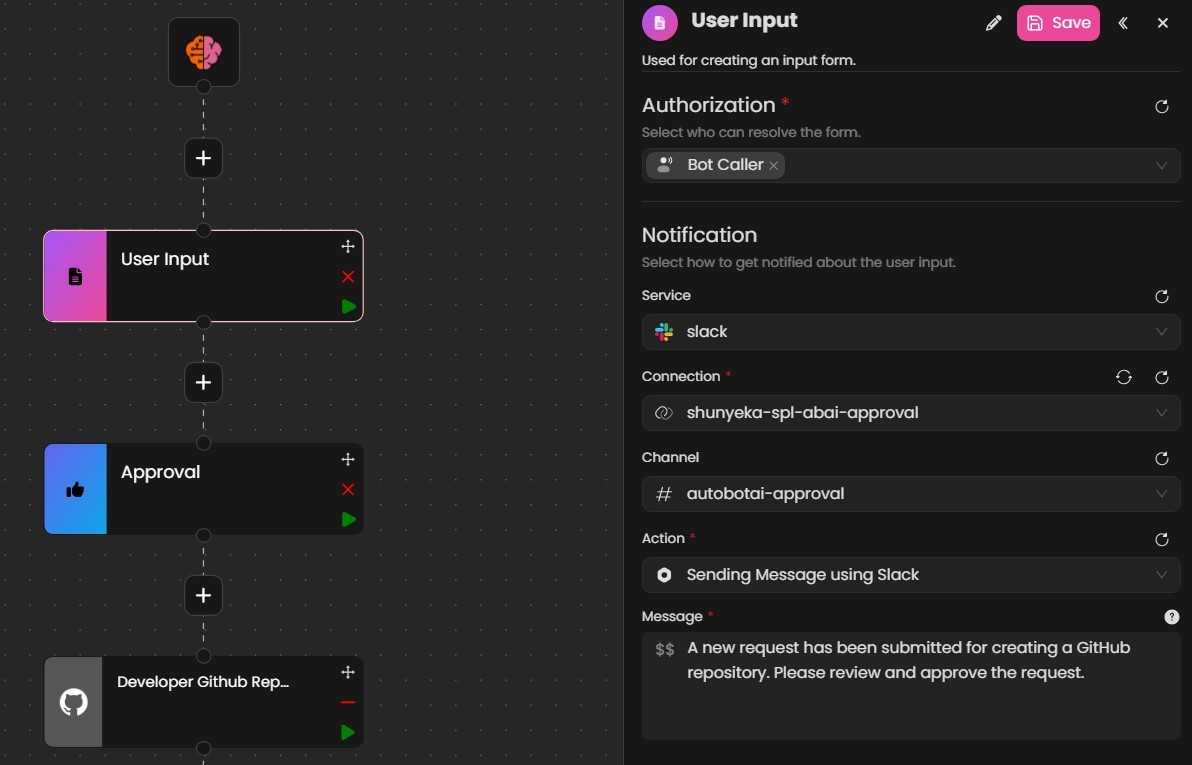
- Form: Design and customize the form fields to collect specific inputs. Include features like validation, dynamic inputs, or AI-assisted suggestions for better accuracy.
-
For a detailed overview of supported field types and their configurations, refer to Supported Field Types for Forms.
4. Save the Configuration
- Before saving the configuration, click the Preview button to view how the form will look. This allows you to confirm the layout and settings before finalizing your changes.
- Once you're satisfied with the preview, click Save to apply your changes. Then, click Update to update the bot with the new node configuration.
5. Run the Input Node to Test
- Run the node and the form will pop up. Fill in the required details and submit the form.
- To check the details, click on the node and then select Execution Details to view the input data.

Supported Field Types for Forms
| Field Type | Description | Additional Settings |
|---|---|---|
| Code | Allows users to input code snippets in various languages. Supports static and dynamic inputs. | - Languages (Supported languages: Python, Bash, JSON). - Enable AI Assistance (Use AI integration like OpenAI, Bedrock for recommendations). - Make this field Required (Make this field mandatory). |
| Date-Time | Collects date and time inputs. Supports static, dynamic, and relative values. | - Make this field Required (Make this field mandatory). |
| Date | Captures date inputs with static, dynamic, or relative entries. | - Make this field Required (Make this field mandatory). |
| Input | Captures free-text inputs with advanced validation options. Supports static and dynamic inputs. | - Validation (Supports regex pattern and error messages). - Multi-line (Allow multi-line input). - Mask Input (Mask sensitive data). - Enable AI Assistance (Use AI integration like OpenAI, Bedrock). - Make this field Required (Make this field mandatory). |
| Number | Accepts numeric inputs, either static or dynamically calculated. Supports static, dynamic, and relative values. | - Make this field Required (Make this field mandatory). |
| Select | Provides a dropdown or multi-select menu for predefined options. Supports static and dynamic options. | - Options (Options to select from). - Multi-select (Allow multiple options). - Make this field Required (Make this field mandatory). |
| Bool | Captures boolean values through a simple yes/no or true/false toggle. | - Make this field Required (Make this field mandatory). |
Note:
Dynamic inputs can be configured to pull values from previous workflow nodes using the JSON path selector ($$). For example, you can set a dropdown's options dynamically based on the output of an API call in the preceding node.
Outcome
By utilizing Input Nodes, you can efficiently capture the information necessary to drive workflow processes. When integrated with the Service Portal, these nodes enhance user experience by enabling streamlined data collection through pre-designed apps.