Jira
Overview
The Jira integration enables autobotAI to connect with your Jira projects, allowing for effective issue tracking, project management, and automation of workflows. By completing this setup, you will link your Jira account to autobotAI, facilitating seamless updates on issues, tasks, and projects, which enhances collaboration and efficiency within your development teams.
This guide provides instructions for setting up an integration with Jira in your autobotAI account. By completing this process, you will connect your Jira account and its associated resources to the platform.
Prerequisites
Before you begin, ensure you have:
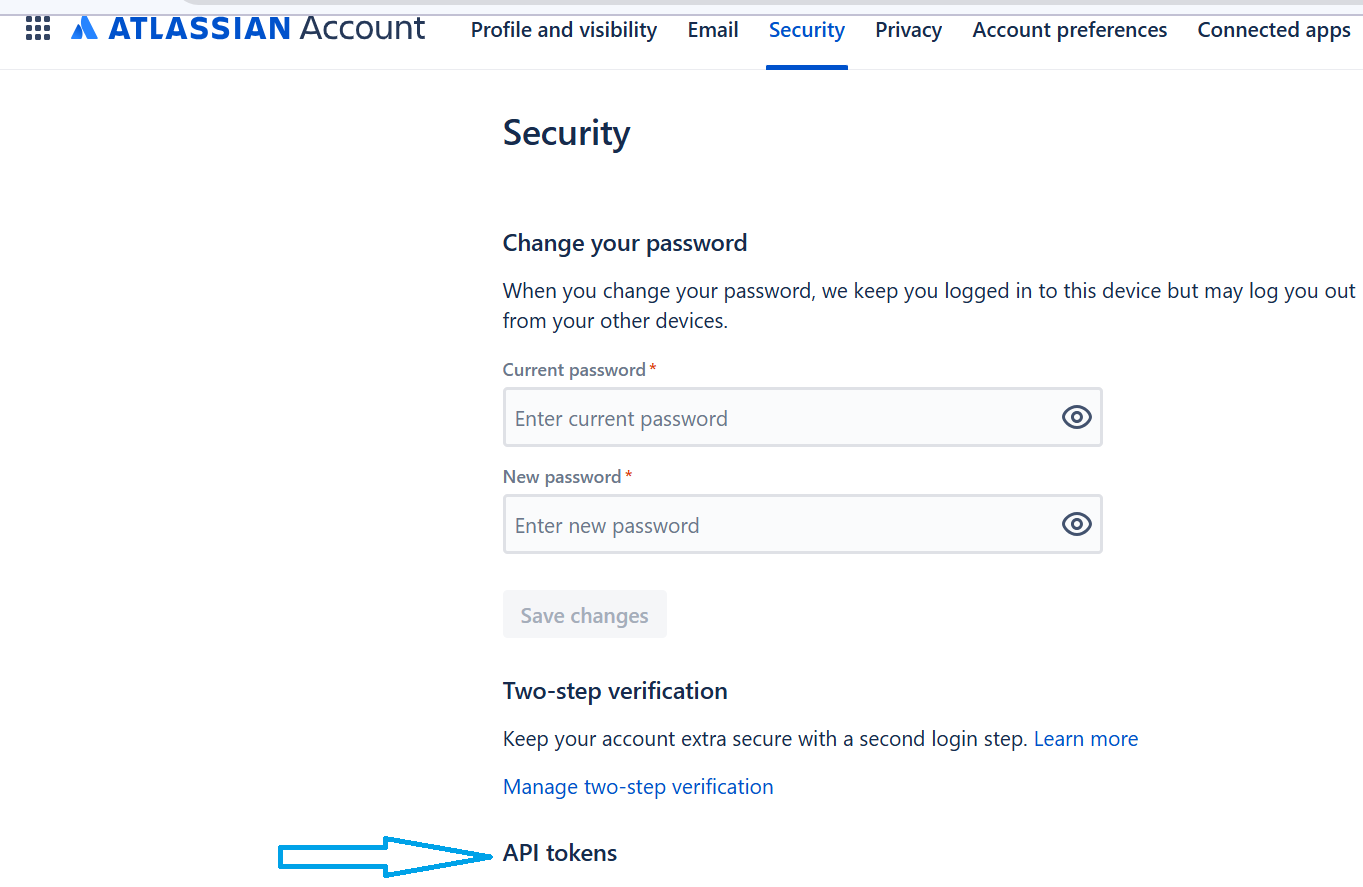
- Access to a Jira Access Token (available in your Jira account settings under the API tokens section).
Follow the instructions in the Additional Information section below to retrieve the API if needed.
Steps to Set Up Jira Integration
Step 1:
Navigate to the Integrations page in autobotAI by selecting Integrations from the menu. Click on the + Add Integration button at the top-right corner to view all available integrations.

From the list, under the Notifications and Communications section, select Jira + Add to initiate the Jira integration setup.

Step 3:
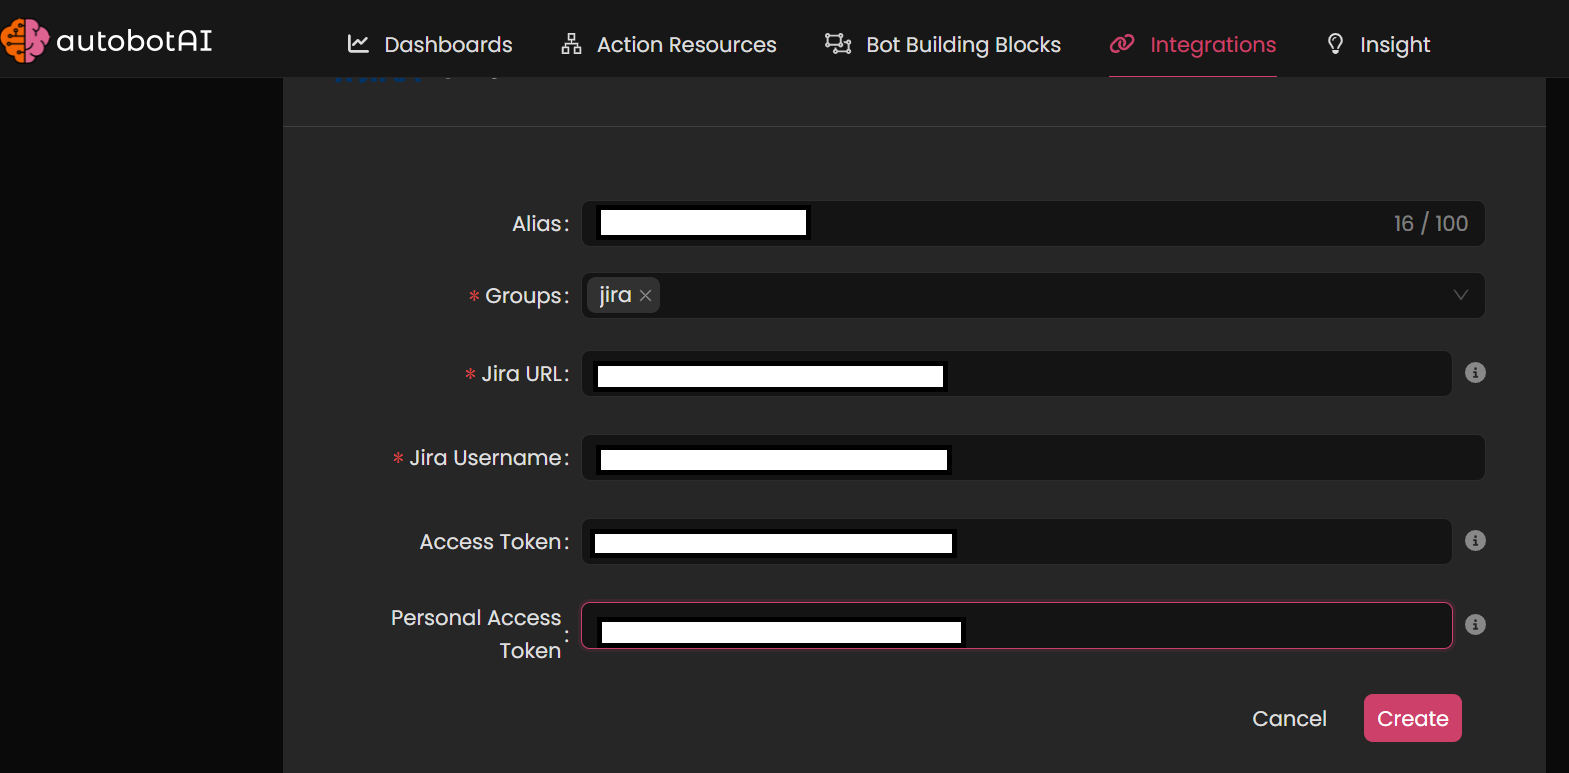
Complete the following fields as required:
Note: Fields marked with an asterisk (*) are mandatory.
- Alias: Provide a meaningful name or alias for this integration.
- Groups: Use groups to organize multiple integrations, similar to labels in email.
- Jira URL: Enter your Jira instance URL (e.g.,
https://yourdomain.atlassian.net). - Jira Username: Provide your Jira account username or email address, depending on your setup.
- Access Token: Enter your Jira access token for authentication.
- Personal Access Token: If required for additional API access, provide a personal access token.
 After completing the required fields, click Create to complete the setup.
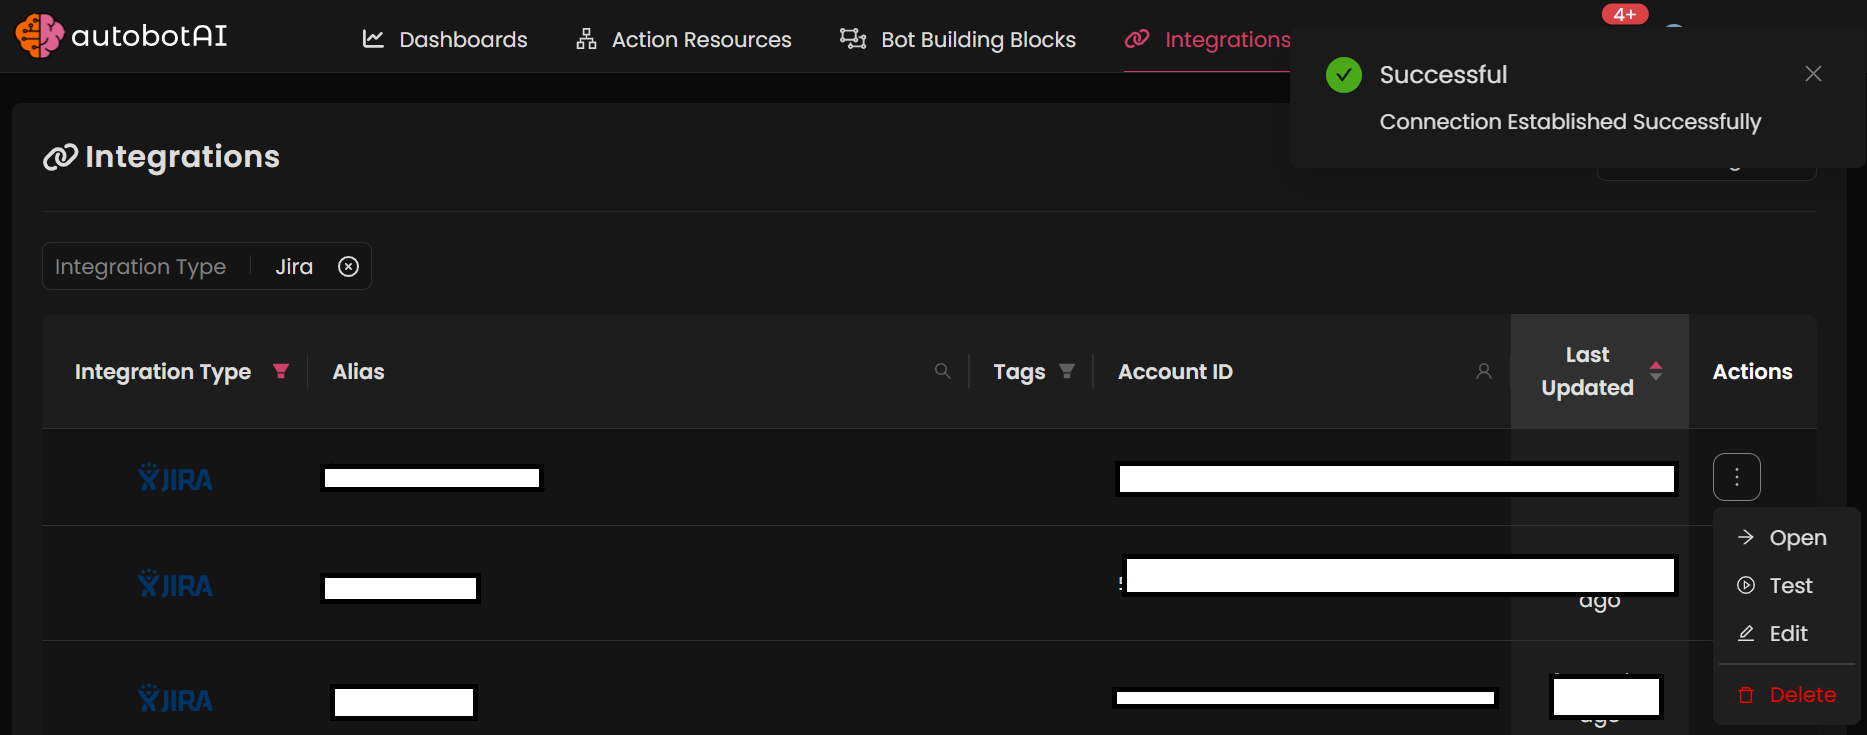
Once the integration is created, locate it under Integrations. Click on the three dots next to it, select Test, and verify that your Jira account is properly connected to autobotAI.

Additional Information
How to Retrieve Your Jira Access Token
-
Log in to your Jira account in settings atlassian account settings.

-
Navigate to the API tokens section in your account settings.
-
Click on Create API token.

-
Name your token and click Create.
-
Copy the generated token and paste it into the Access Token field in autobotAI during the integration setup.
After completing the setup, be sure to test the integration to confirm connectivity and functionality with your Jira account.
