Configuring Delay Nodes in Workflow Automation
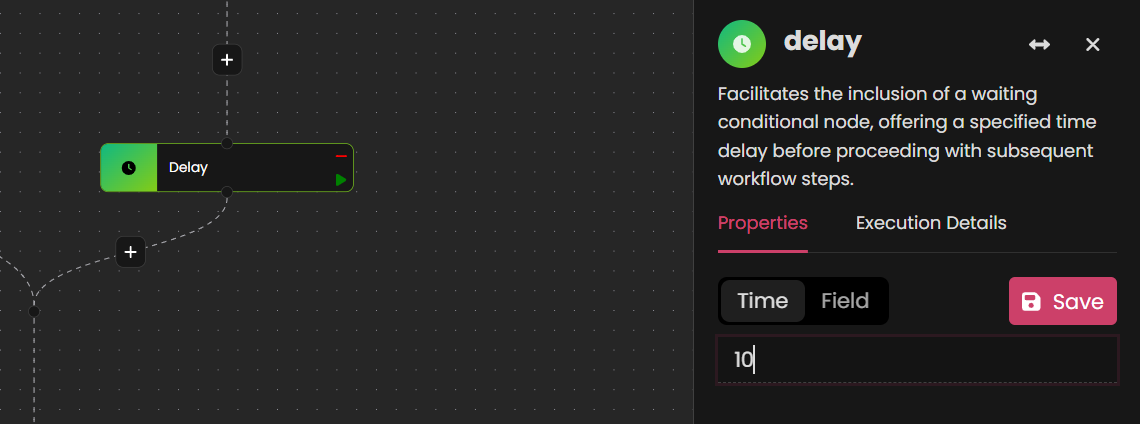
The Delay node allows you to add a specified pause between actions in a workflow. This can be beneficial when actions need to be spaced out, such as sending notifications at intervals or introducing time-based conditions in workflow execution.
Example Use Case
Use the Delay node to introduce a time interval between notifications or stagger actions for smoother workflow performance.
Steps to Configure a Delay Node
Follow these steps to add and configure a Delay node in your workflow:
-
Add the Delay Node
- Drag the Delay node into your workflow canvas from the node library.
-
Configure Delay Time
- Click on the Delay node to open its configuration panel.
- Set the delay interval in the Time field, specifying the duration in minutes.

-
Save the Configuration
- Once the delay time is set, click Save to apply the configuration.
-
Run the Delay Node Individually
- To test this specific node, click the green run button directly on the Delay node interface. This will execute only the Delay action, allowing you to validate the timing without running the entire workflow.
Outcome
By configuring Delay nodes, you can effectively control the timing between actions, ensuring smoother operation and proper pacing for tasks within your workflow.
